Bootstrap Checkbox Toggle
Intro
In some cases the most basic aspects might actually become really essential-- most especially as you come to need them. For instance how do your website visitors interact with the web pages you build specifying a basic Boolean action-- simply yes or no relating to a couple of the issues you have to request, precisely how they do consent to the terms or else line up a handful of the feasible options they might have. We most likely get past this without paying enough of an recognition to the element accountable for such activities however the Bootstrap Checkbox Position is actually a quite important feature-- one our forms just can't actually do without.
Within the latest fourth edition of the Bootstrap platform we are presented with the
.form-check.form-check-label<div>.form-check.form-check-label<label><input>.form-check-inputEffective ways to work with the Bootstrap checkbox:
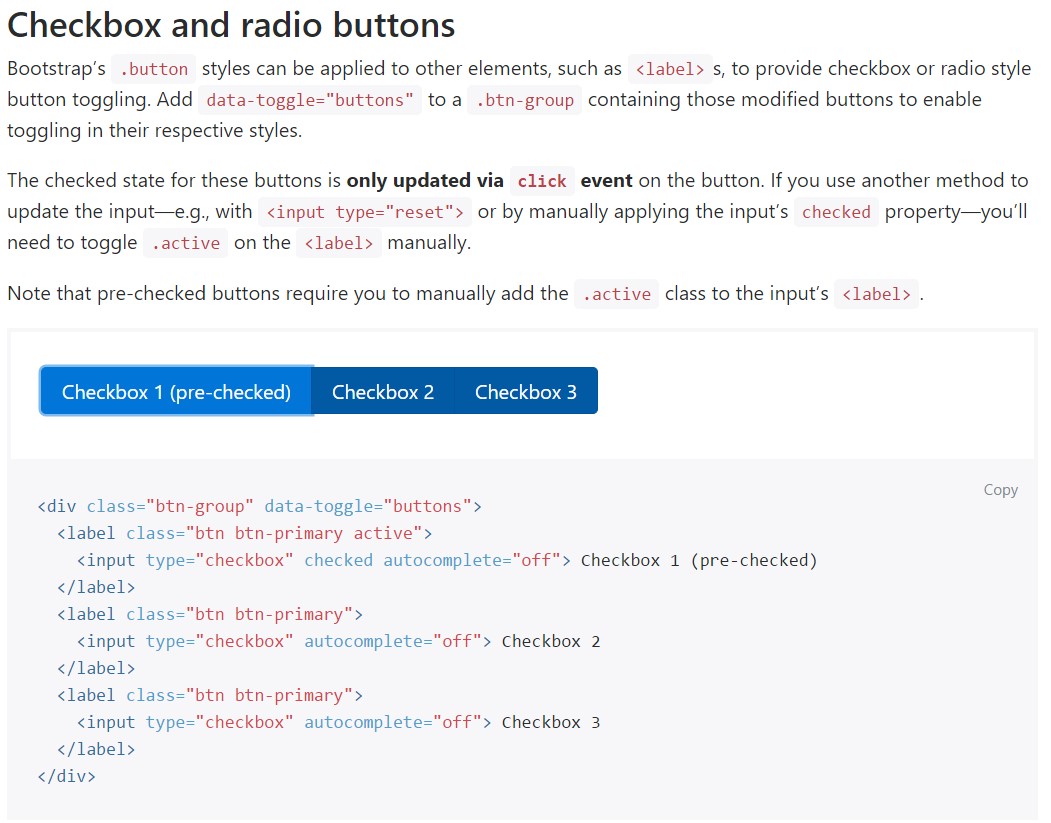
Bootstrap's
.button<label>data-toggle=" buttons".btn-group
<div class="btn-group" data-toggle="buttons">
  <label class="btn btn-primary active">
    <input type="checkbox" checked autocomplete="off"> Checkbox 1 (pre-checked)
  </label>
  <label class="btn btn-primary">
    <input type="checkbox" autocomplete="off"> Checkbox 2
  </label>
  <label class="btn btn-primary">
    <input type="checkbox" autocomplete="off"> Checkbox 3
  </label>
</div>
Sometimes we want to have the checkboxes to take place inside our forms without the user truly being able to have any type of practice clicking on them-- that's where exactly the disabled option appears in.
If you want to disable correctly a checkbox in Bootstrap 4 applying the common HTML attribute
disabledIn the case that you like the tip and clearly really want to accomplish this you should certainly appoint the
.disabled.form-checkYet another good example
Whenever applying checkboxes, wrap all of them in a
<label>.custom-control.custom-checkboxWork with
.custom-control-input<input>In addition put into action two
<span>.custom-control-indicator.custom-control-description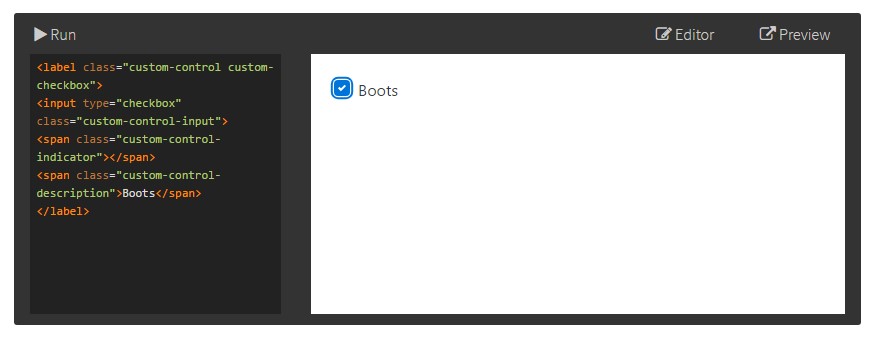
<label class="custom-control custom-checkbox">
<input type="checkbox" class="custom-control-input">
<span class="custom-control-indicator"></span>
<span class="custom-control-description">Boots</span>
</label>
Bootstrap Checkbox Style forms
Default radios and checkboxes are upgraded upon with the assistance of
.form-checkDisabled checkboxes and radios are provided, but to give a
not-allowed<label>.disabled.form-checkA brand-new component for the Bootstrap version 4 framework is the launch of the so called custom-made form elements. These are the very same elements we are known inside capability although designated even more desirable and with the Bootstrap method. By having them you can surely add some excitement and individuality to your material with simply just appointing a few supplemental classes to the controls you incorporate in your forms.
In order to use custom-made checkboxes wrap them in a
<label>.custom-control.custom-checkbox<input>.custom-control-input<span>.custom-control-indicator.custom-control-descriptionConclusions
That's essentially all that you have to perform in order to include a checkbox feature in your Bootstrap 4 powered website page and incorporate a number of custom-made flavor to it providing it a quality appearances. Now everything you need to do is repeat the practice before you've examined all the checkboxes wanted are readily on the page.
Check a couple of on-line video short training regarding Bootstrap checkbox
Connected topics:
Bootstrap checkbox formal information
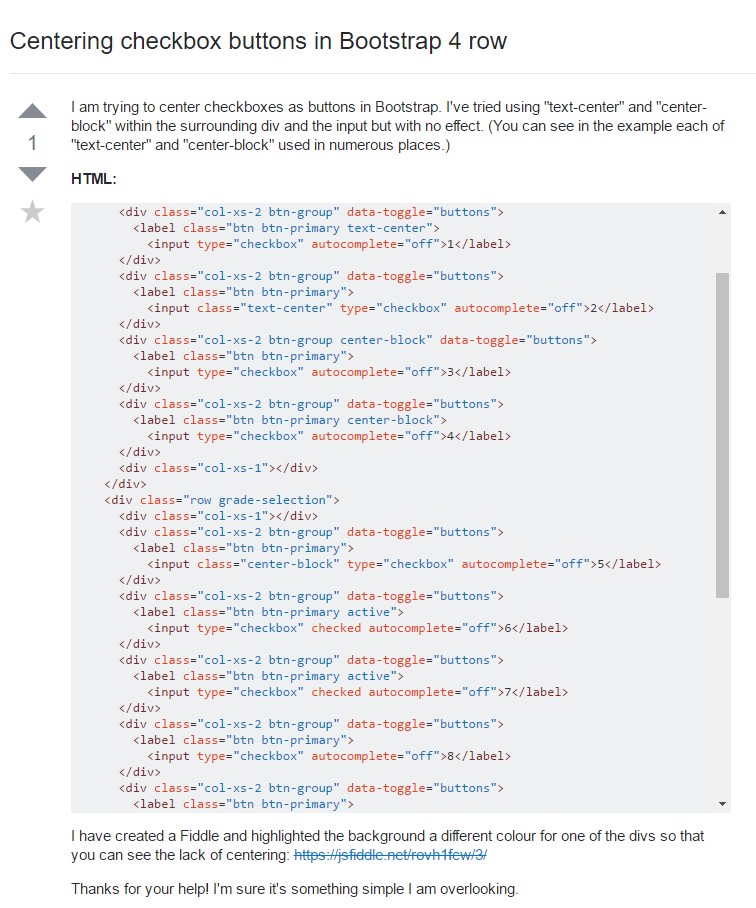
Centering checkbox buttons in Bootstrap 4 row
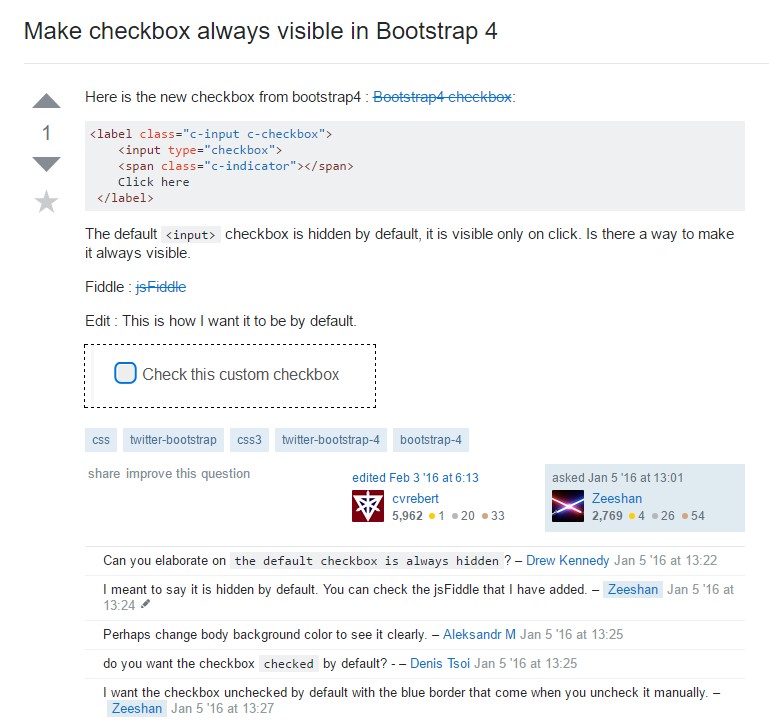
Make checkbox always visible in Bootstrap 4